Best Emergency Kit for RV Travel: Checklist & Gear
Best Emergency Kit for RV: Essential Gear & Checklist for 2026
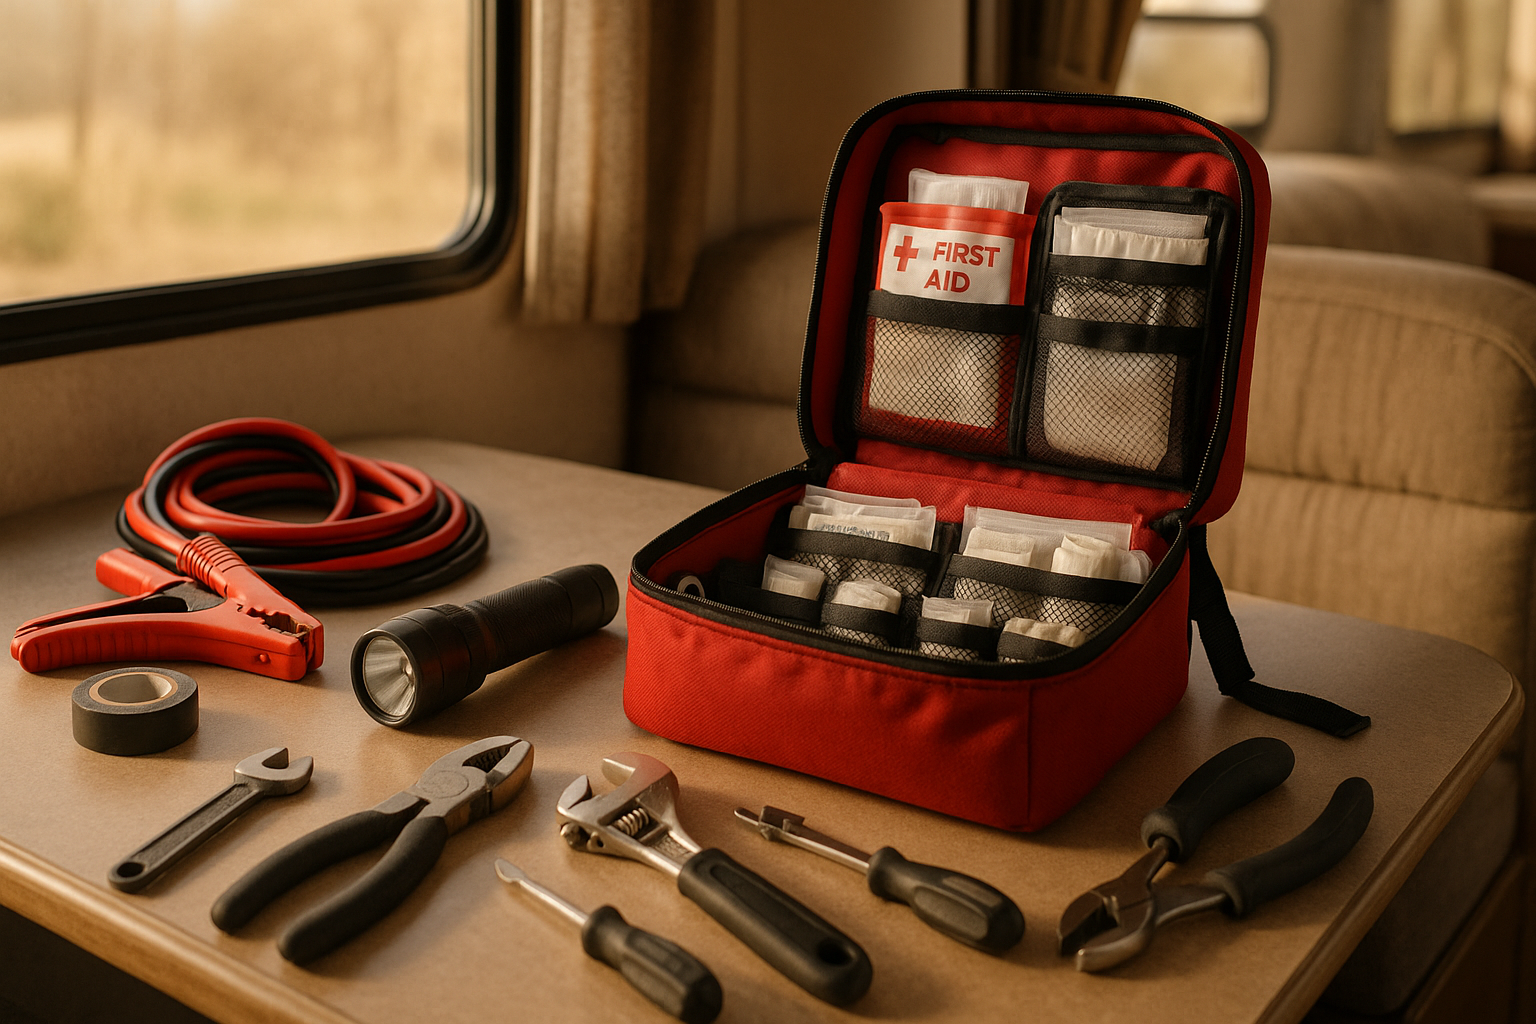
RV travel combines freedom with isolation—breakdowns, weather, and power loss happen miles from help. A purpose-built emergency kit is the difference between a minor inconvenience and a dangerous situation. This guide walks you through the core categories, specific gear that works in mobile living, and how to organize everything so you can find it under stress.
Why RVs Need a Dedicated Emergency Kit
Standard home emergency kits don’t translate to the road. Your RV has unique failure modes: engine breakdown, propane leak, fresh-water tank rupture, battery drain, weather exposure without a fixed shelter, and isolation from immediate roadside services. A roadside assistance membership helps, but you’ll wait 30–90 minutes in a breakdown scenario—your kit needs to bridge that gap and handle scenarios where professional help is unreachable.
RVs also occupy a middle ground. You’re not hiking (you have weight capacity and power systems) but you’re not at home (you lack a garage, grid power, or a hardware store nearby). The kit must be compact, organized, and accessible without dismantling your living space.
Core Categories Every RV Emergency Kit Needs
1. First Aid & Medical Response
Cuts, burns, allergic reactions, and minor trauma happen on the road just as they do at home—but a hospital might be 45 minutes away.
What to include: - Sterile gauze pads (2×2 and 4×4 sizes) - Elastic bandages (ACE-style wraps for sprains) - Antibiotic ointment and pain relief tablets - Tweezers and small scissors - Thermometer - Medications you take regularly, plus 7 extra days’ supply - Antihistamines and anti-diarrheal medication - Hydrocortisone cream for rashes - Blister treatment and moleskin - CPR face shield or pocket mask
RV owners consistently recommend carrying a pre-assembled kit rather than loose items—you won’t remember what you have when stress is high. 
2. Power & Charging
Modern RV travel depends on phones, GPS, medical devices, and (if boondocking) refrigeration and water pumps. Battery drain is among the most common emergency scenarios RV owners face.
What to include: - Portable power station (capacity depends on your rig and usage; see sizing guide below) - Solar panel or car charger to recharge the power station - USB cables and adapters for phones, tablets, and laptops - Cigarette-lighter car charger as a backup - Jumper cables or portable jump starter
For multi-day off-grid trips or full-time RVers, a mid-tier to premium portable power station (500Wh–3kWh) is essential. For occasional road trips, a budget-tier 200–300Wh unit handles phone charging and small devices.
If your RV has solar installed, your emergency power is already integrated—but keep a portable power station as a backup in case panels are shaded or damaged.
3. Water & Sanitation
Fresh water is critical. A ruptured tank, contaminated supply, or boondocking scenario can cut off water access.
What to include: - Portable water filter (LifeStraw, Sawyer, or similar—no electricity required) - 5–10 gallons of bottled water stored in the RV (rotate every 6 months) - Water testing strips to check for bacterial contamination - Hand sanitizer and wet wipes - Toilet paper and waste bags (if your black tank fails or you’re stranded) - Biodegradable soap
A gravity-fed or squeeze-activated filter is more reliable than battery-powered options in emergencies—fewer failure points. LifeStraw Go Series Water Filter Bottle is a popular choice because it doubles as a drinking bottle. Note: LifeStraw filters remove sediment, bacteria, and some protozoa but not all viruses; consult manufacturer specs for your specific water source.
4. Tools & Roadside Repair
Many RV breakdowns can be temporarily fixed with basic tools—a flat tire, loose hose clamp, or corroded battery terminal.
What to include: - Multi-tool (Leatherman or Victorinox) - Adjustable wrench and 8–10 common socket sizes - Screwdriver set (both Phillips and flathead) - Pliers (needle-nose and standard) - Jumper cables or portable jump starter - Tire plug kit and tire pressure gauge - Duct tape (wrap 10 feet around a pencil to save space) - Hose clamps (assorted sizes) - Flashlight with extra batteries - Work gloves
The most-used items are jumper cables, tire plugs, and a multi-tool—prioritize those if space is tight. A pre-assembled automotive emergency kit like Steelhead Automotive Emergency Kit bundles many of these items and fits in a small bag.
5. Communication & Navigation
Breakdowns often happen in areas with weak cell signal. You need backup ways to call for help and navigate if your main GPS fails.
What to include: - Paper maps of regions you travel frequently - Backup battery pack for your phone - Car charger for your phone - Two-way radio or satellite communicator (Garmin InReach or similar) for truly remote travel - Whistle (for signaling if stranded) - Headlamp with extra batteries
A satellite messenger (like Garmin InReach) is invaluable if you camp in areas with no cell coverage—it lets you message for help and share your location with family.
6. Shelter, Warmth & Weather Protection
Your RV is shelter, but if it breaks down in cold or heat, you need backup insulation and protection.
What to include: - Emergency blanket (reflective, compact) - Sleeping bag or heavy blanket - Tarp and rope (can create shade or windbreak) - Duct tape (doubles as emergency sealant for leaks) - Caulk and sealant (for minor roof or window leaks) - Heavy-duty plastic sheeting (for covering broken windows) - Work gloves and safety glasses
7. Food & Nutrition
A breakdown might strand you for hours or overnight. Non-perishable, high-calorie snacks keep morale and energy up.
What to include: - Protein bars or granola bars (3–5 per person) - Nuts and dried fruit - Crackers and peanut butter - Canned soup or stew (with pull-tab opener) - Instant oatmeal packets - Electrolyte drink mix or sports drink powder
Shelf-stable foods that don’t require cooking are best—your stove might not work if the RV is disabled.
8. Safety & Visibility
If you break down on a highway, visibility and warning are critical.
What to include: - Reflective warning triangles or flares - Fluorescent safety vest - Headlamp or flashlight - Fire extinguisher (rated for RV electrical and propane fires) - First aid kit (covered above, but bears repeating)
How to Organize Your RV Emergency Kit
Use multiple containers, not one “emergency box”: - Small bag: First aid, medications, and hygiene items. Keep in a bedroom or bathroom cabinet for quick access if someone is injured. - Tool roll or bag: Wrenches, screwdrivers, pliers, and jumper cables. Store in the garage bay or under a bench seat. - Water and food bag: Bottled water, snacks, and water filter. Keep accessible in a cabinet or under a seat. - Power station: Portable battery. Store in a cool, dry spot (not in direct sun or extreme heat). - Comfort bag: Blankets, tarp, flashlight, and warning triangles. Store in a locker or under a bed.
This distribution means you can grab what you need without excavating the entire RV. It also spreads weight and volume, making efficient use of limited storage.
Maintenance & Rotation Schedule
Emergency kits degrade over time. Batteries die, medications expire, and water goes stale.
Every 3 months: - Check battery levels in flashlights and headlamps; replace if dim - Verify water bottles are sealed and undamaged - Confirm medications are not expired
Every 6 months: - Replace bottled water (rotate old bottles for regular use; refill with fresh) - Check first aid supplies for expired items or dried-out ointments - Test your portable power station: charge it fully, then discharge it completely. Compare the runtime to the manufacturer spec sheet; if runtime is 20% or more below spec, the battery is aging and may need replacement.
Every 12 months: - Replace any food items (granola bars, nuts) that show signs of spoilage - Check tire plug kits for dried-out rubber; replace if needed - Inspect hoses, clamps, and cables for corrosion or wear
Powering Your RV in an Emergency
If your main power system fails (engine won’t start, solar is blocked, or generator breaks), a portable power station is your lifeline.
Quick sizing rule: - Budget-tier (200–300Wh): Phones, laptops, small lights. 1–2 days of light use. - Mid-tier (500–1000Wh): Add a small fridge or water pump for 1–2 days. - Premium-tier (2000Wh+): Run a full-size fridge, furnace, or multiple devices for 3+ days.
A mid-tier power station covers most scenarios and weighs less than a gas generator.
FAQ
Q: What’s the best portable power station? A: The Jackery Explorer 240 and EcoFlow River 2 both offer solid capacity for phones, laptops, and small devices. For RV-specific needs like running a small fridge, step up to a 500–1000Wh unit like the Goal Zero Yeti 500X .
Q: How do I know if my water filter is failing? A: Most portable filters show declining flow rate before they fail completely. If water takes significantly longer to filter than when new, or if you notice discoloration or odor in filtered water, replace the filter cartridge. Check the manufacturer’s rated gallon capacity (e.g., LifeStraw: 1000+ gallons) and track your usage. Replace after reaching the limit or annually, whichever comes first.
Q: How much water should I store in my RV? A: At minimum, 1 gallon per person per day for 3 days (drinking and basic hygiene). If you boondock frequently or travel remote routes, store 5–10 gallons. Rotate every 6 months. A water filter extends stored water by letting you safely use questionable sources.
Q: Do I need a satellite communicator if I have cell service most of the time? A: If you camp in areas with reliable coverage, a satellite device is optional. If you venture into remote national forests, deserts, or mountains, it’s worth the investment.
Q: Should I keep my emergency kit accessible or hidden? A: Accessible. In a breakdown or injury, you won’t have time to hunt. Use labeled containers and store them in easy-to-reach spots (under a seat, in a cabinet, or a dedicated locker). Keep a written checklist inside the main bag so you know what’s there.
Q: What’s the difference between a portable power station and a jump starter? A: A jump starter (500–1000A) is designed to crank your engine. A portable power station (200Wh–3kWh) powers devices and appliances. You need both: the jump starter to get your engine running, and the power station to keep devices charged if the engine won’t start or you’re stranded.
Q: How often should I test my emergency kit? A: Every 6 months, test your power station (charge and discharge it), check battery levels in flashlights, and verify medications are not expired. Every year, do a full inventory and replace expired or damaged items.
Putting It All Together
An RV emergency kit is insurance against common failures: breakdowns, power loss, water issues, injuries, and weather. Build it in layers—start with first aid and basic tools, then add a power station and water filter as budget allows. Organize it across multiple containers so you can grab what you need without chaos.
The goal isn’t to be 100% self-sufficient for weeks; it’s to bridge the gap between a problem and professional help, and to stay safe and comfortable while that help arrives. A well-stocked kit gives you options and peace of mind—and lets you focus on the journey instead of worrying about what happens if something goes wrong.
Store your kit, rotate it twice a year, and test the power station annually. When you need it, you’ll be glad it’s there.